





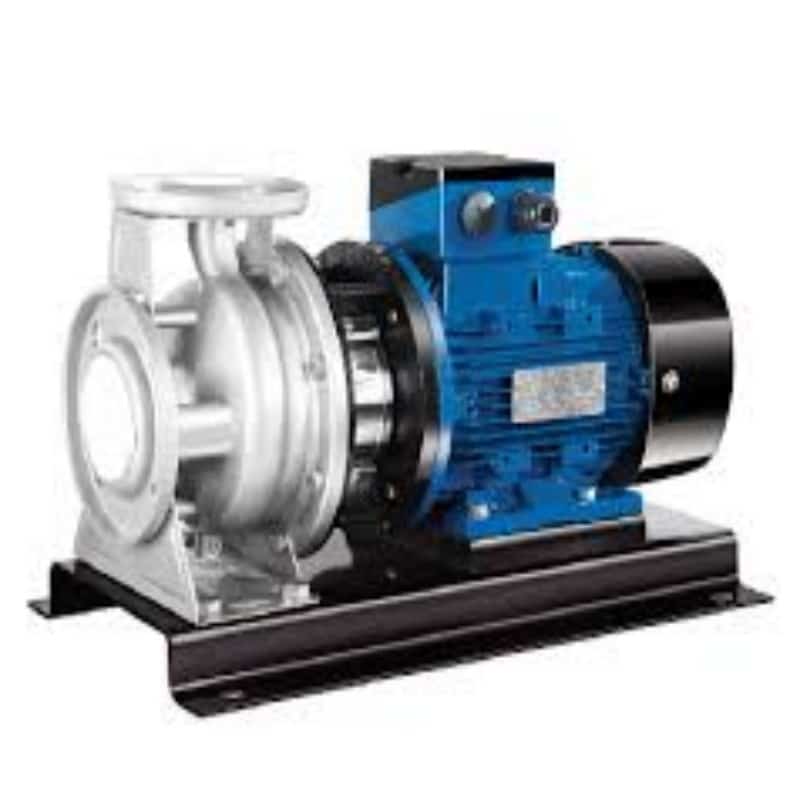


You use industrial centrifugal water pumps every day. These pumps help your work go well. Good maintenance and troubleshooting stop expensive problems. They also keep your equipment working its best. Many pumps break because people skip regular care. This causes mechanical problems and surprise stops.
Skipping regular checks often causes mechanical trouble.
When you follow a plan, pumps work better and last longer. A clear plan helps you spot ways to improve performance. It also helps you save money on energy and repairs. The table below shows how taking care of pumps helps your business:
Benefit | Percentage Increase/Reduction |
|---|---|
Equipment Lifespan | 20–30% |
Energy Savings | 10–25% |
Unplanned Downtime Reduction | 50% |
Improved Safety and Compliance | N/A |
You can use this Maintenance Guide to take real steps. You can follow easy checklists. You can also build a strong plan for success.
Maintenance Guide Overview

Importance of Routine Checks
You keep your pump running well when you check it often. Routine checks help you spot small problems before they turn into big failures. If you look for leaks, listen for strange noises, and watch the temperature every day, you can catch issues early. This habit saves you money and prevents long stops in your work.
When you follow a Maintenance Guide, you make sure your pump stays safe and efficient. Regular checks also help you meet safety rules and avoid accidents. Pumps that get checked often last longer and use less energy. You can see the main daily and weekly checks in the table below:
Frequency | Maintenance Task |
|---|---|
Daily | Visual Inspection: Look for leaks, listen for odd sounds, and check if temperatures are normal. |
Pump Operation: Start and stop the pump, watch pressure and flow. | |
Lubrication: Check and add oil or grease to bearings or seals. | |
Weekly | Impeller and Casing: Check for wear or damage. |
Bearing Housing: Watch the temperature. | |
Seals: Look for leaks. |
Tip: Write down what you find during each check. This record helps you see changes over time and plan repairs before trouble starts.
Key Maintenance Intervals
You need to follow a schedule to keep your pump in top shape. Each part of the pump needs care at different times. If you stick to a clear plan, you avoid missing important steps. The Maintenance Guide gives you a simple way to remember what to do and when.
Here is a quick look at how often you should do key tasks:
Inspection Type | Frequency |
|---|---|
Routine Inspections | Weekly or Monthly |
Lubrication/Adjustments | Monthly |
Full Checks | Every 3 to 6 Months |
You can also use this list to plan your work:
-
Look for leaks.
Check how well the pump works.
Inspect shaft seals for damage.
Monthly Maintenance
Compare suction and discharge pressures.
Check shock mounts and tighten bolts.
Inspect seals and change oil every three months.
Measure power use and check alignment.
Every 1-2 Years
Take the pump apart for a full inspection.
Replace worn parts like seals, wear rings, and impellers.
Annual checks help you find hidden problems. You should also record how the pump performs each year. This habit helps you spot trends and plan for upgrades or repairs.
Note: Maintenance intervals can change based on how much you use the pump and the type of fluid you move. Always check your Maintenance Guide and follow the manufacturer’s advice.
By following these steps, you make sure your pump works well for years. You also lower the risk of sudden breakdowns and keep your work running smoothly.
Daily and Periodic Maintenance
Bearing and Seal Inspection

You should check the bearings and seals every day. Start with a visual inspection. Look for leaks around the bearing covers and seals. Check for cracks or any changes in shape. Next, measure the bearing surface temperature. The normal range is 30°C to 70°C. Listen for odd noises like grinding or whining. These sounds can mean the bearing is failing. Use your hand or a tool to feel for vibration. If you notice more vibration than usual, this could be a sign of trouble. Always check the oil level. It should be between half and two-thirds of the mark. If the oil looks dirty, change it.
Here are some signs of wear you might find:
Sign of Wear | What It Means |
|---|---|
Unusual noise | Possible bearing failure |
Increased vibration | Issues with bearings |
Overheating of bearing housing | Lubrication problem |
Grooves on the seal | Too much pressure or not enough lubrication |
Squealing sound | Not enough lubrication on the seal |
Cracked seal face | Damage from impact or heat |
Carbon dust | Not enough lubrication between seal faces |
Tip: Write down what you see and hear during each inspection. This helps you spot changes early.
Vibration and Temperature Monitoring
You need to monitor vibration and temperature to keep your pump healthy. Use vibration sensors to check for abnormal movement. If the vibration goes above the limits in standards like API 610 or ISO 10816-7, take action. High vibration can mean the pump is out of balance or misaligned. Measure the temperature around the bearing housing. If it rises above normal, check for worn parts or poor lubrication. Ignoring these signs can lead to big failures. When you catch small problems early, you prevent costly repairs.
Watch for sudden changes in vibration or temperature.
Listen for new noises during operation.
Adjust alignment or balance if you find problems.
Lubrication Schedule
Proper lubrication keeps your pump running smoothly. For oil-lubricated bearings, use non-foaming, non-detergent oil. Fill the oil to the middle of the sight glass. Change the oil after the first 200 hours of use, then every three months or 2,000 hours. For grease-lubricated pumps, add grease every three months or 2,000 hours. Always follow the Maintenance Guide and your pump’s manual for exact steps. Clean lubricant keeps out dirt and water. Even a small amount of water can cut bearing life by four times. Check the lubricant often and replace it if it looks dirty.
Note: Most bearing failures happen because of dirty or old lubricant. Keep your pump clean and follow the schedule to avoid problems.
Troubleshooting Guide

If your centrifugal water pump has problems, you must find out why fast. This guide helps you fix the most common issues. It tells you what to check and what to do next. Use the tables and lists below to help you solve problems quickly.
No Flow or Low Flow
If your pump is on but little or no water comes out, many things could be wrong. Use this checklist to help you find the cause:
Common Causes of No Flow or Low Flow:
Impeller spins the wrong way.
Suction line is blocked.
Impeller, wear ring, or wear plate is worn out.
There is too much space inside the pump.
Debris is stuck in the impeller.
Discharge or suction valve is closed.
Bypass valve is open.
Vortexing happens at the suction.
Diagnostic Steps:
Make sure the impeller turns the right way.
Check the suction line for anything blocking it.
Look for damage or wear on the impeller vanes.
Check wear rings or bushings for uneven spots.
Listen for odd sounds or feel for shaking, especially at low flow.
Look for broken shafts that you cannot explain.
Check if the pump casing or bearings are too hot.
Tip: Always check the valves first. A closed valve is easy to fix.
Quick Reference Table:
Symptom | Possible Causes | Diagnostic Steps | Solution |
|---|---|---|---|
No Flow | Closed valve, wrong rotation, clog | Check valves, rotation, suction line | Open valve, fix wiring, clean |
Low Flow | Worn parts, debris, open bypass | Check impeller, bypass, measure spaces | Replace parts, close bypass |
Overheating
If your pump feels hot or shuts off from high heat, you must act fast. Overheating can break the pump and stop your work.
Cause Type | Description |
|---|---|
Mechanical Issues | Closed outlet valve, blocked check valve, or pipe blockage traps heat. |
Fluid System Problems | Hot or dirty water makes the pump work harder and get hotter. |
Electrical and Motor Issues | Too much load or bad power makes the motor overheat. |
Lubrication and Heat Dissipation | Not enough oil or blocked vents keep heat from leaving. |
Installation and Maintenance Errors | Wrong parts or missed care puts stress on the pump. |
How to Diagnose and Fix Overheating:
Look for closed or blocked valves and pipes.
Check if the water is dirty or too hot.
See if the motor is overloaded or has bad power.
Make sure the pump has enough oil and air can move around it.
Check your records for missed care or wrong parts.
Note: Keep the area around the pump cool and clear. This helps heat leave the pump.
Open any closed valves.
Clean filters and suction lines.
Add or change oil if needed.
Let more air move around the pump.
Use the right thermal protection for the motor.
Vibration and Noise
Strange sounds or shaking can mean something is wrong inside your pump. You need to find the problem before it gets worse.
Common Sources of Vibration and Noise:
Source Type | Specific Causes |
|---|---|
Mechanical Noise | Unbalanced impeller, shaft not lined up, loose bolts, bearing rubbing, or resonance. |
Hydraulic Noise | Cavitation, turbulence, pressure changes, or running away from best efficiency point (BEP). |
What to Check:
Look for loose bolts or parts.
Use a vibration meter to check for shaking.
Check if the shaft is lined up using a laser tool.
See if bearings are hot or noisy.
Listen for popping or crackling, which means cavitation.
Test flow and pressure to see if the pump is working right.
Diagnostic Steps:
Look for loose or worn parts.
Measure how much the pump shakes.
Check if shafts and couplings are lined up.
Look at bearings for wear or too much heat.
Watch the suction for signs of cavitation.
Test the flow and pressure inside the pump.
Tip: Lining up the shafts and balancing the impeller often stops shaking.
Leaks and Seal Issues
Leaks around your pump waste water and can cause damage. Most leaks happen because of problems with seals or joints.
Common Causes of Leaks and Seal Failures:
Cause | Description |
|---|---|
Dead-Heading | Outlet valve is closed, pressure builds up, and the seal gets damaged. |
Starving The Pump | Not enough water at the inlet causes cavitation and seal stress. |
Heat | Too much heat can bend or harden seals. |
Chemical Incompatibility | Wrong seal material swells or cracks in harsh fluids. |
Improper Installation | Seals are not lined up or get damaged during setup. |
Dry Running | Pump runs without water, and friction damages seals. |
Other causes are:
Damaging seal faces during setup
Using the wrong piping connections
Not tightening gland bolts evenly
How to Diagnose and Repair Leaks:
Check if the pump ran dry or pumped a different fluid.
Watch for shaking to find alignment or bearing problems.
Look at the flushing system for good flow and no debris.
Check the seal support system to see if it works right.
Tighten bolts around joints for small leaks.
Change gaskets or seals if leaks do not stop.
Note: Always use the right seal material for your fluid and temperature. Seals for hot water must handle high heat so they do not fail.
Quick Reference Table:
Symptom | Possible Causes | Diagnostic Steps | Solution |
|---|---|---|---|
Leaks | Seal wear, loose bolts, heat | Check seals, tightness, look for heat | Tighten bolts, change seals |
Seal Failure | Dry running, wrong material | Check fluid type, review setup | Use right seal, reinstall |
If you follow these steps and use the tables, you can fix most pump problems fast. Regular checks and quick fixes keep your pump working and your job on track.
Advanced Diagnostics
Vibration Analysis
You can use vibration analysis to find pump problems early. When you check vibration, you look for movement in different ways. You check up and down, side to side, and along the shaft. You do this on important parts of the pump. This helps you find things like misalignment, loose parts, or worn bearings.
Direction(s) | |
|---|---|
Vibration Velocity | Vertical, Horizontal, Axial |
Drive End Bearings | Vertical, Horizontal, Axial |
Non-Drive End Bearings | Vertical, Horizontal, Axial |
Pump Casing | Vertical, Horizontal |
Inlet/Outlet Pipes | Horizontal |
Vibration analysis works best with other tools. If you only use vibration checks, you find about 16% of early problems. If you add ultrasonic testing, you find almost all early issues. Most pump failures—about 67%—happen because of bearing or lubrication problems. If you check vibration often, you can fix these before your pump stops.
Tip: Write down your vibration readings. Watch for sudden changes. These changes can mean a part is wearing out or needs fixing.
Performance Monitoring
You can watch your pump’s health by tracking key numbers. These numbers show how well your pump works and help you plan care.
Description | |
|---|---|
Cavitation | Causes extra wear and more vibration. Makes seals and bearings wear out faster. |
Restricted Flow | Happens when strainers clog. Can hurt the pump and lower how much water it moves. |
Excessive Vibration | Shows parts may be out of line or breaking. |
Auxiliary Seal Flush Levels | Checks pressure and fluid in the seal system to stop leaks. |
You should also watch flow rate, pump runtime, temperature, and vibration patterns. If the flow rate drops or the temperature goes up, your pump may need care soon. Tracking runtime helps you know when to check the pump. Changes in vibration can warn you about mechanical trouble.
Parameter | Description | Importance in Maintenance |
|---|---|---|
Flow Rate | Measures how much fluid moves each time. | Drops can mean pump trouble. |
Pump Runtime | Tracks how long the pump runs. | Helps you plan checks and repairs. |
Operational Temperature | Shows pump temperature during use. | Big changes can hurt parts. |
Vibration Detection | Looks at vibration patterns. | Changes may mean parts are breaking. |
By using these advanced diagnostics, you can keep your pump working longer and stop expensive breakdowns.
Specialized Procedures
Bearing Replacement
You need to replace pump bearings when you notice noise, vibration, or heat. Follow these steps to make sure you do the job right:
Disassemble as Required
Remove any parts that block your way to the bearing. Use special tools so you do not damage the pump.Select the Appropriate Bearings
Pick new bearings that match your pump’s diagrams and charts. Check the size, speed, and lubrication needs.Install the New Bearings
Place the new bearings in the correct spot. Make sure they line up straight. Follow the instructions from the manufacturer.Reassemble and Test
Put the pump back together. Tighten all bolts. Start the pump and listen for noise or feel for vibration.Consider Manufacturer Recommendations
Always check the manual for special steps. Some pumps need extra care because of their design.
Tip: Write down each step you take. This helps you remember what you did and makes future repairs easier.
Seal Installation
You must install seals carefully to stop leaks and keep your pump running well. Good seal work prevents early wear and keeps water inside the pump.
Always install seals in a clean area.
Use the right lubricant to keep the seal faces cool and reduce friction.
Never let the seal run dry. Dry seals can overheat and break.
Slide the new seal parts gently along the shaft.
Use a new o-ring or gasket. Press the stationary part into the pump casing.
Set the rotary part back on the shaft as the instructions say.
CAUTION: Do not touch the front of the seal faces. Oil from your skin can damage the seal and cause leaks.
If you follow these steps, you help your pump last longer and work better.
Reliability Planning
Maintenance Strategies
You can keep your centrifugal water pump running longer by following smart maintenance strategies. Start by checking for leaks in seals and gaskets. Leaks can lead to bigger problems if you ignore them. Listen for new or loud noises. These sounds often warn you about mechanical issues. Use vibration analysis to find imbalances or misalignments before they cause damage. Track how your pump performs each day. If you see a drop in efficiency, you may need to inspect the pump.
You should also look inside the pump from time to time. Check the impellers and seals for wear. Condition monitoring tools help you predict failures before they happen. Try to run your pump near its Best Efficiency Point (BEP). This keeps it working smoothly and saves energy. If you use a Variable Frequency Drive (VFD), you can control the pump speed and reduce wear.
Here is a quick checklist for your maintenance strategy:
Check for leaks in seals and gaskets.
Listen for unusual noises.
Use vibration analysis.
Track pump performance.
Inspect internal parts for wear.
Operate near BEP and use VFDs when possible.
Tip: Use your Maintenance Guide to plan these steps and keep records of each check.
Failure Analysis
When your pump fails, you need to find out why. Start by checking if the flow rate is steady. Make sure the outlet valve is open. Look for blockages in the pipes. Repair any leaks you find. If the motor is not working, check the rotor balance and the insulation of the windings. Replace the motor if needed. Make sure the pump and pipes connect well to avoid extra stress.
You can use this table to help with failure analysis:
Step | What to Check |
|---|---|
Flow Rate | Is it steady or dropping? |
Outlet Valve | Is it open? |
Piping System | Are there any blockages? |
Leaks | Do you see any leaks? |
Motor | Is it running smoothly? |
Connections | Are all joints tight and secure? |
Accurate diagnosis helps you fix problems fast and keeps your pump safe. You need to observe what happens, analyze the cause, and choose the right solution. Good failure analysis protects your equipment and your team.
You make your pump work better when you take care of it before problems start. If you check your pump often and fix things early, you get good results for a long time.
You spend less money fixing the pump and lose less time at work. This helps you make more money.
You find problems early, so you do not have to stop work without warning. You also save time and effort.
You help your pump last longer because you only change parts when you need to.
You make your workplace safer and help keep the environment clean.
Keep making your maintenance plan better. Good ideas help your pumps work well for many years.








 English
 Chinese
 German
 Russian
 Japanese
 French
 Dutch
 Italian